How to: Create a CloudFront Distribution for a non-public AWS S3 Bucket
Introduction
This document assumes that you already have a private AWS S3 Bucket, if not, please follow the instructions here:
Create and Configure a Cloudfront Distribution
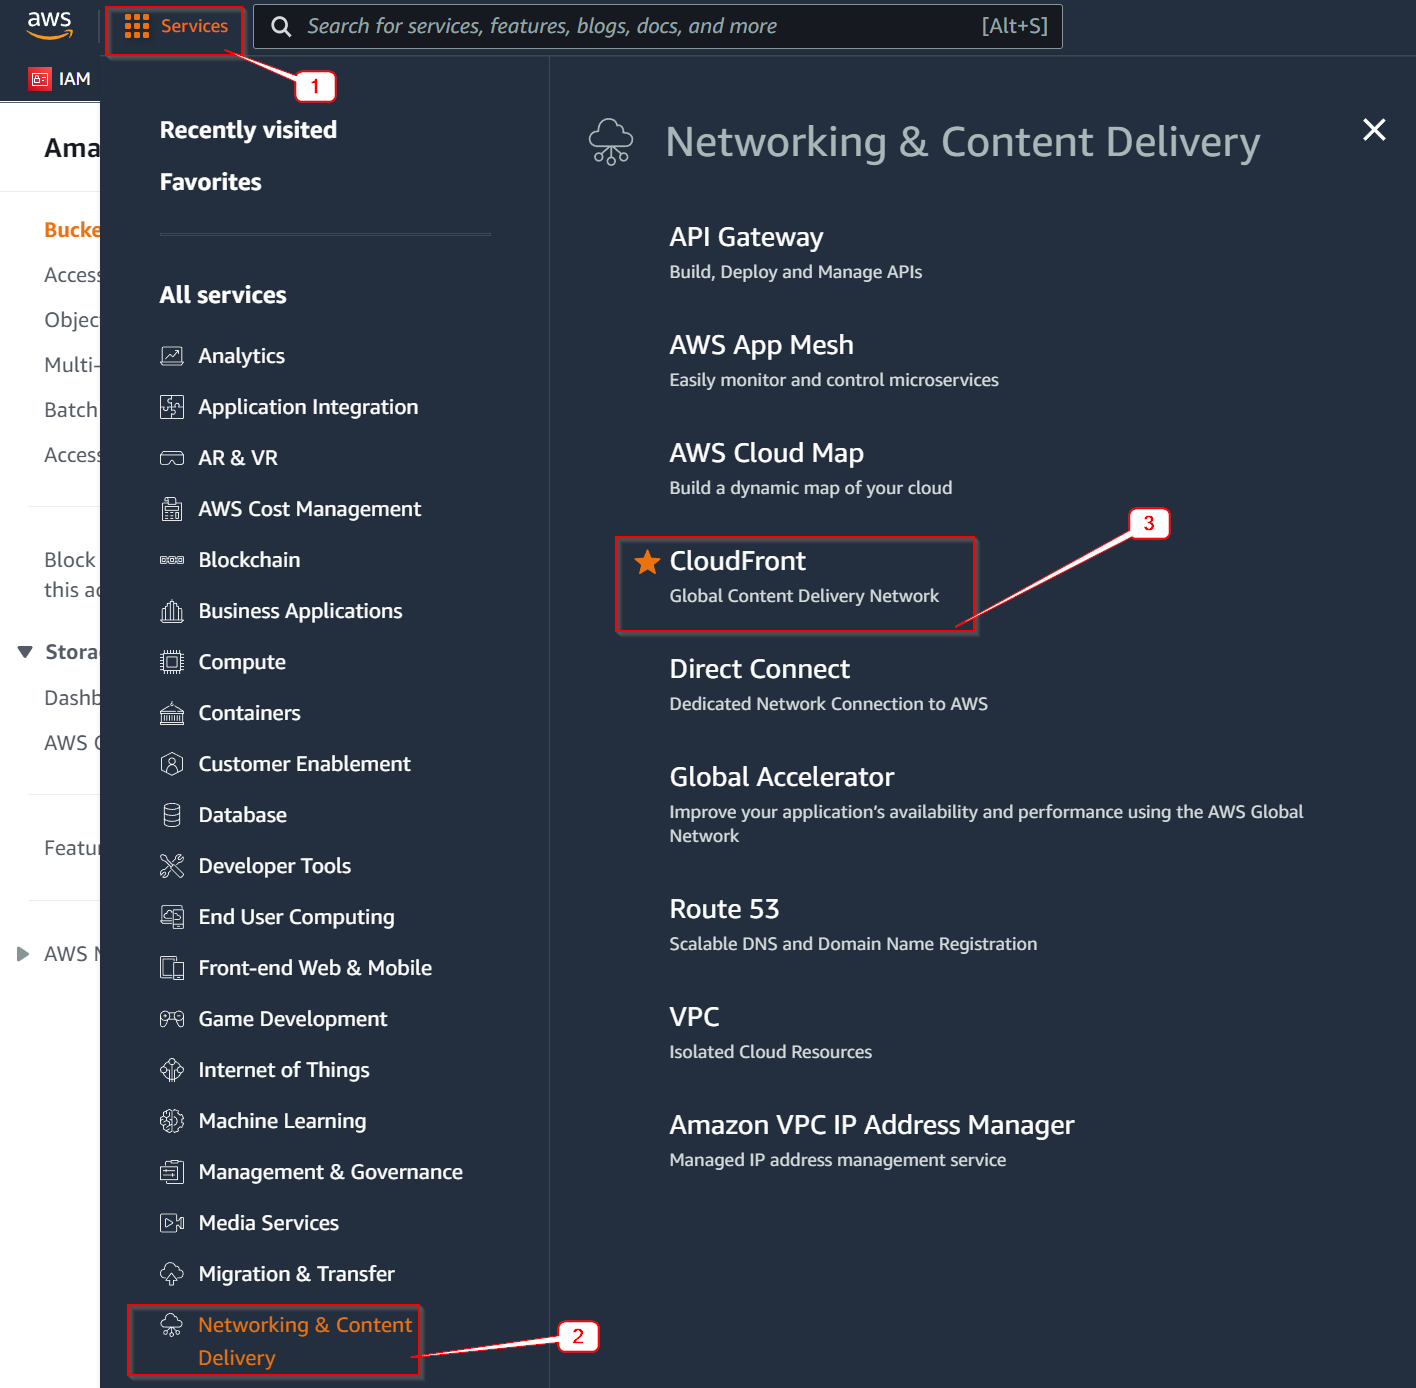
Navigate to CloudFront:
You should now see a list of Distributions (if any)
Click “Create distribution”:

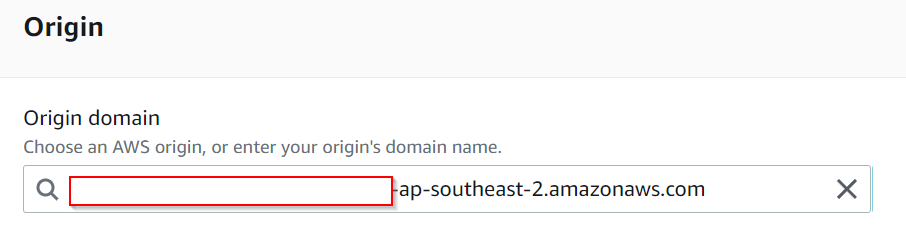
Paste Bucket URL (BUCKET_NAME.s3.BUCKET_REGION.amazonaws.com) in the Origin Domain field:
In the S3 Bucket Access section, tick “Yes use OAI (bucket can restrict access to only CloudFront)”
Then click “Create new OAI”. This will create a new Origin Access Identity (OAI)
Tick “Yes, update the bucket policy”

Select Redirect HTTP to HTTPS

Add an alternate domain name, this is the domain name you want to link to this bucket.
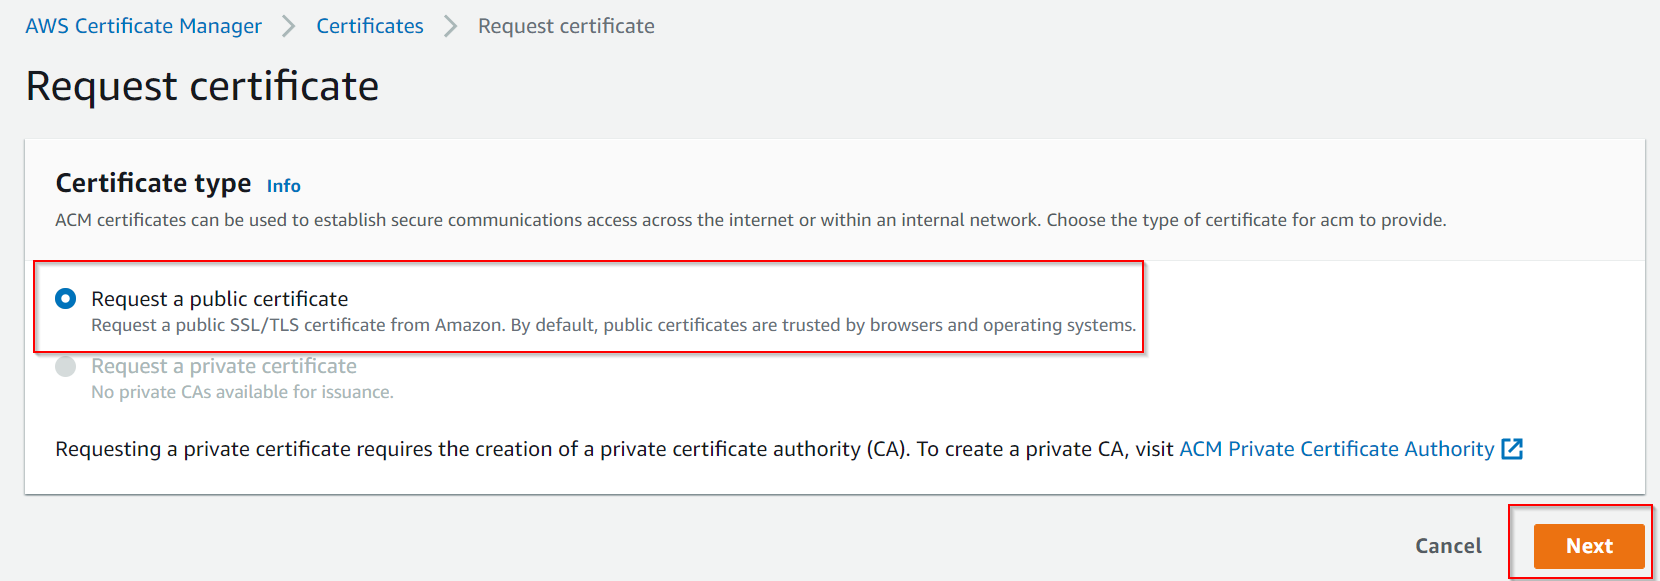
In the “Custom SSL Certificate” section, click on “Request Certificate”:

This will navigate to a new page, which is the AWS Certificate Manager
Make sure “Request a public certificate” is selected, then click “Next”
Refresh the AWS Certificate Manager page.
You should see a list of certificates.
Click on the Certificate ID you just created.
Copy the DNS Settings (CNAME and CNAME Value)
Linking Cloudfront to your Domain
Please follow the instructions in: How to Link a Google Domain to AWS S3, using Cloudfront and AWS Certificate Manager
Test your site.
You should now be able to access your site using