
In this guide, we will go over the steps of hosting a static site (HTML, JS, CSS) on a AWS S3 Bucket
Introduction
AWS S3 is a storage solution from Amazon Web Services (AWS), it also allows you to host a static website.
What you will need
You will require a few things for this guide:
- AWS Account
- A static website
- A domain
Steps
- Login into AWS Console
- Create and Setup an AWS S3 Bucket
- Create SSL Certificate using AWS CloudFront
1. Login to AWS Console
- Login to the AWS Console
2. Setup a S3 Bucket
Select “Services - Storage ->S3” from the top left menu
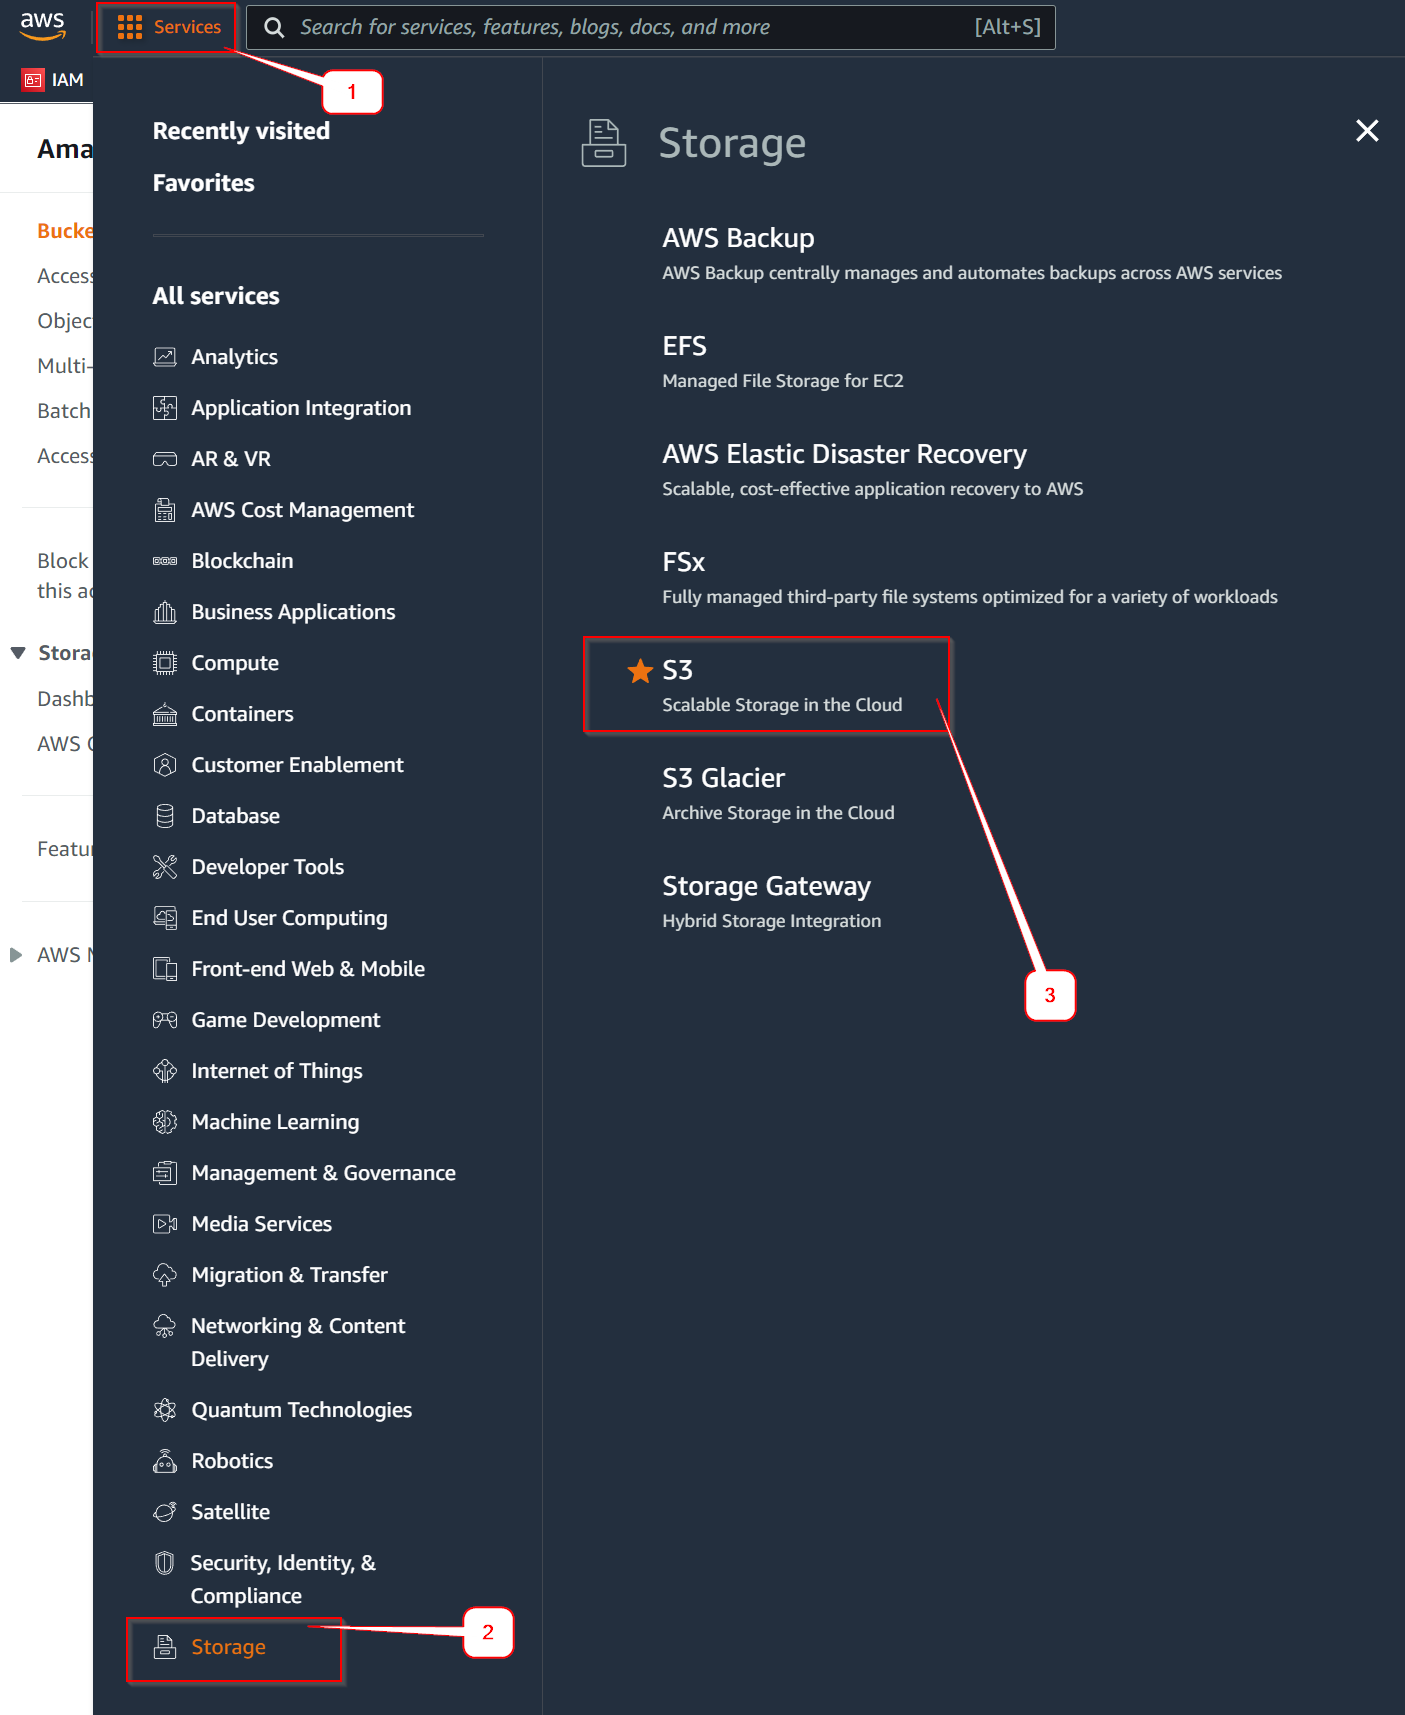
Click on “Create Bucket” to create a new bucket

A “Create Bucket” window will display:
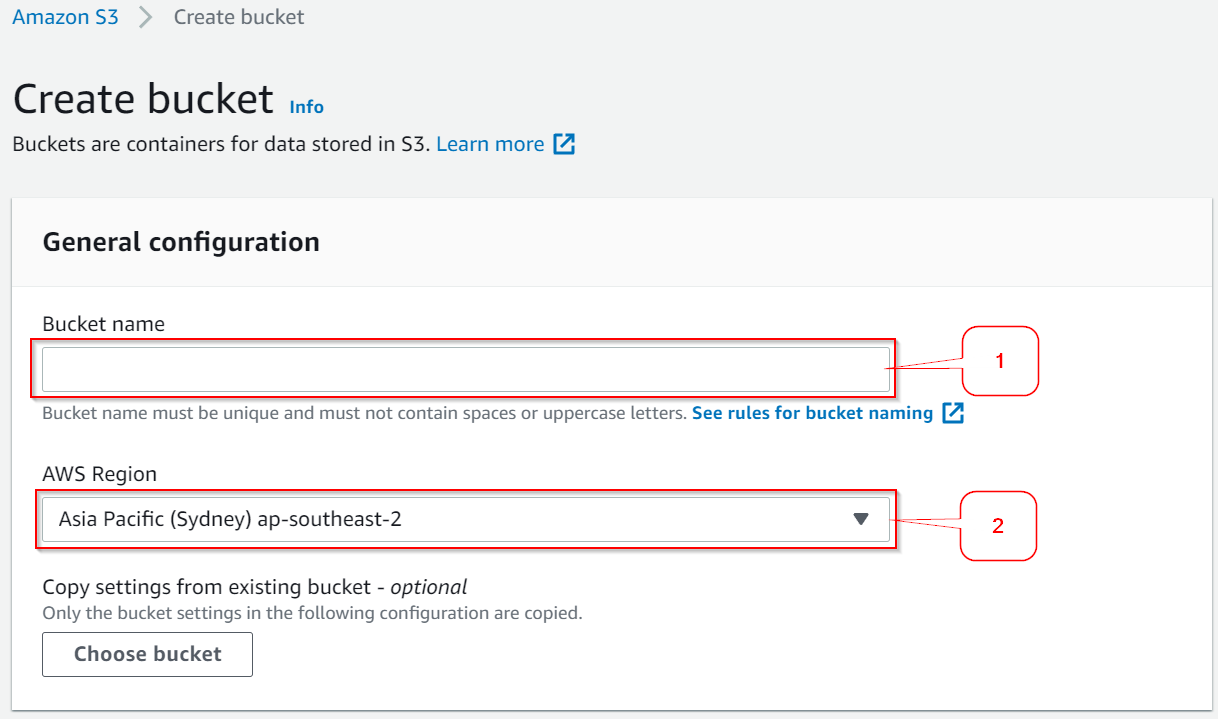
Enter a name for the bucket (1), ideally with the same name as your domain name
Select the region where you want the assets to be hosted (2)
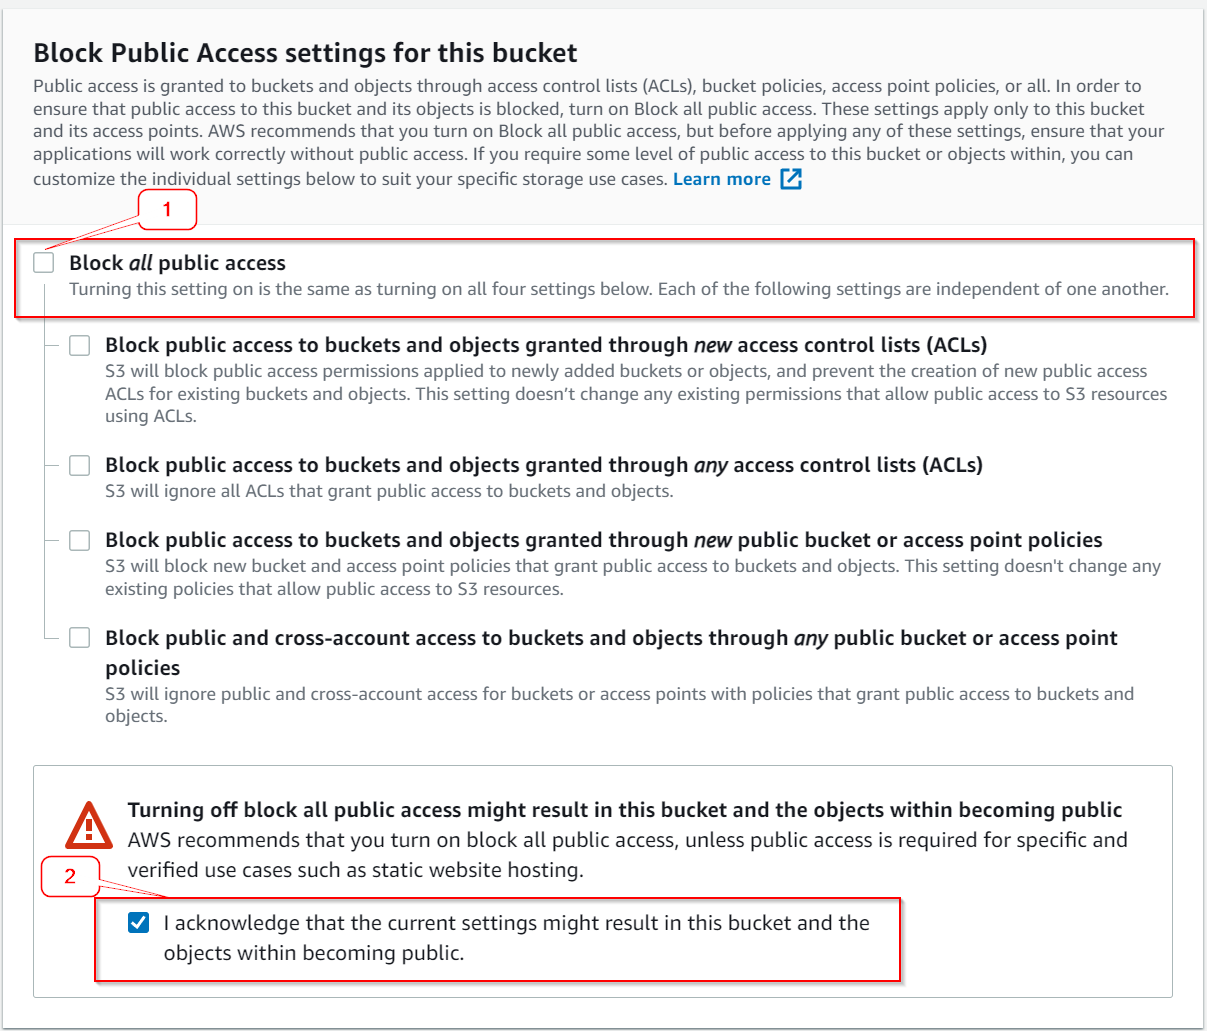
Untick “Block Public Access” (1) and tick “I acknowledge that…” (2):
Scroll down to the bottom of the page, and click “Create bucket”:

2.1 Enable Static Hosting on AWS S3 Bucket
The bucket should now appear in the Buckets list
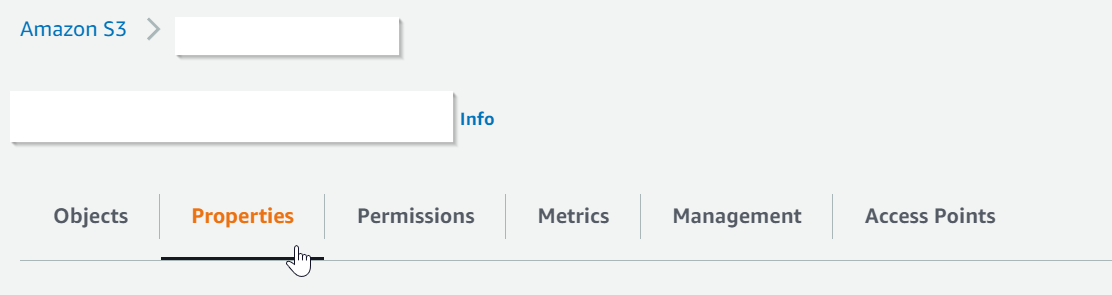
Select the bucket you created, by clicking on the name of the bucket.
Click on “Properties”:
Scroll down to the bottom of the page
In the “Static Website Hosting” section, click “Edit” (1)

A new window will be displayed:
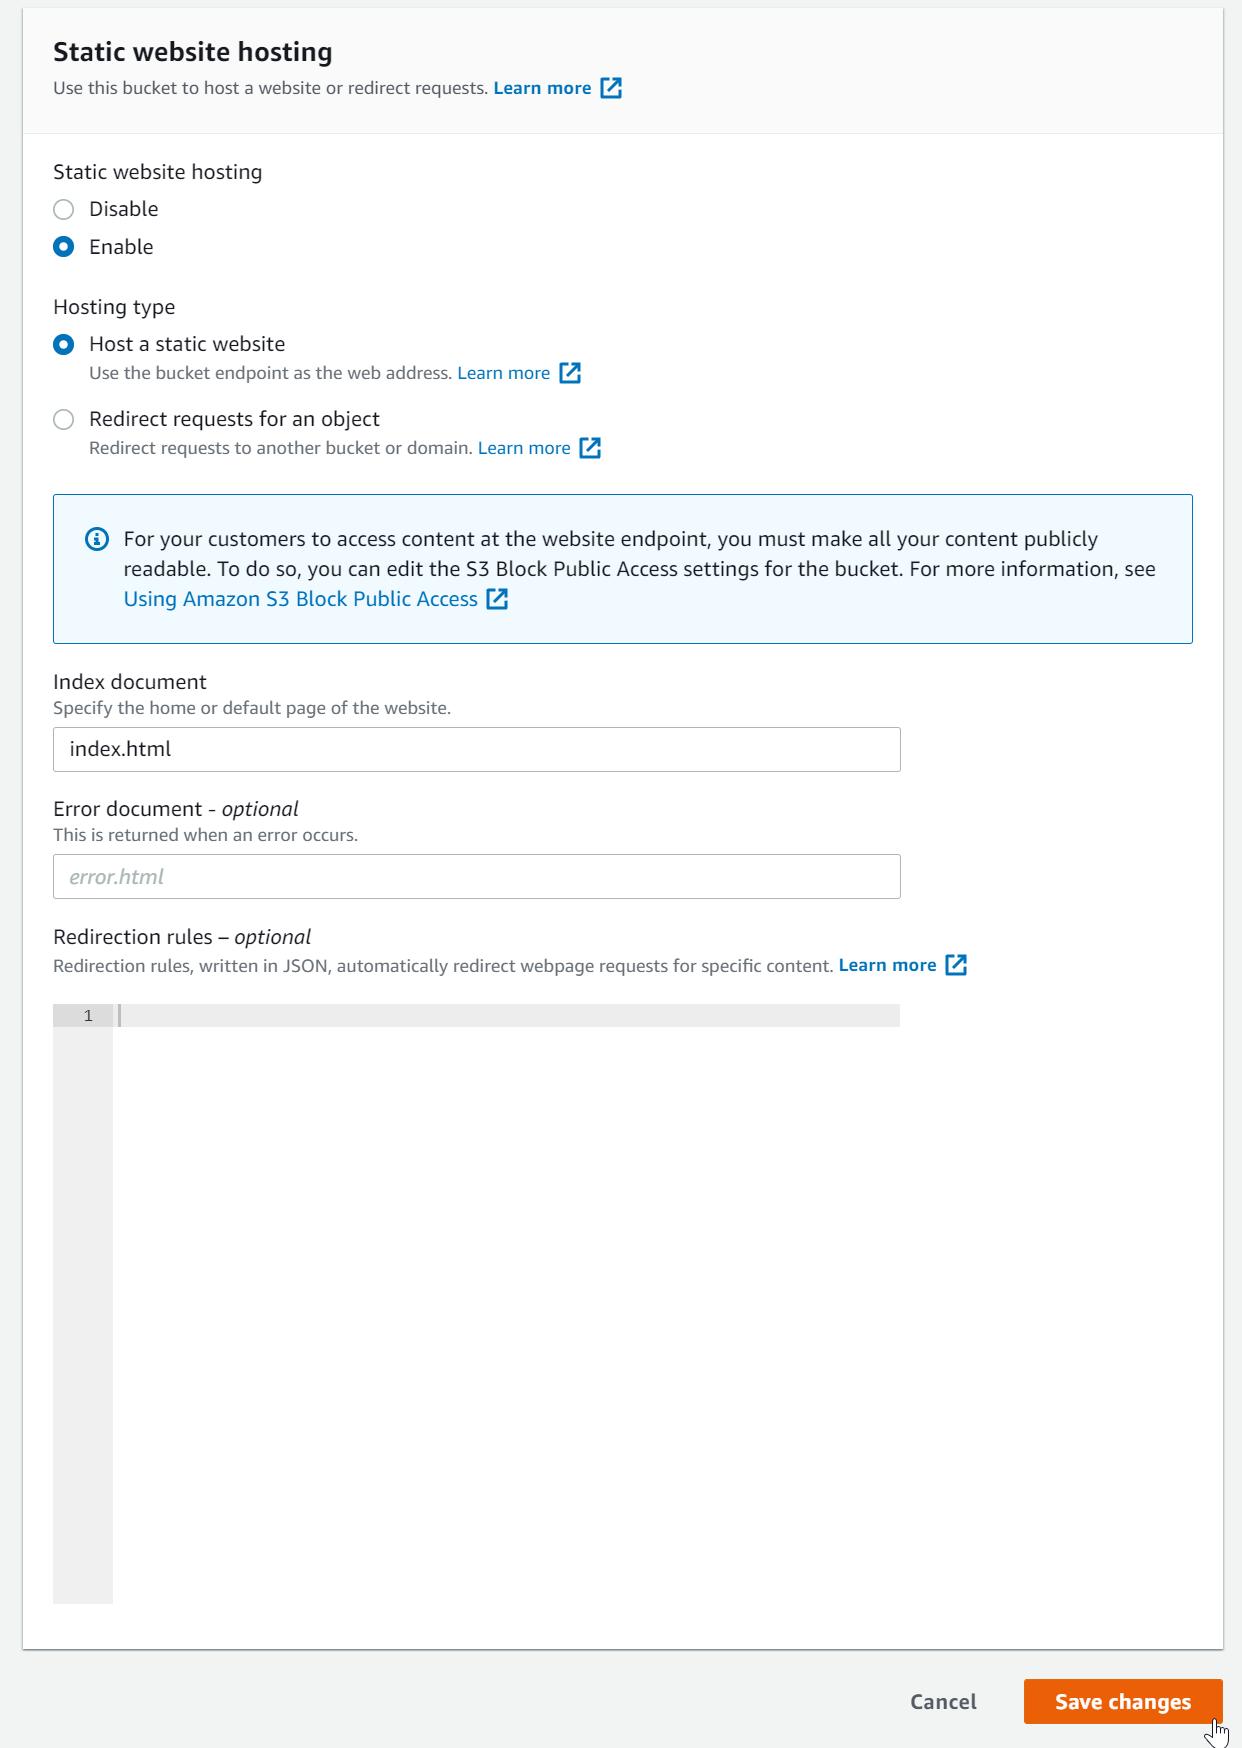
Enter “index.html” in the Index document field:

Click “Save changes”
At the bottom of the page, you should see a Bucket website endpoint
Copy this URL by clicking on the copy button (1):
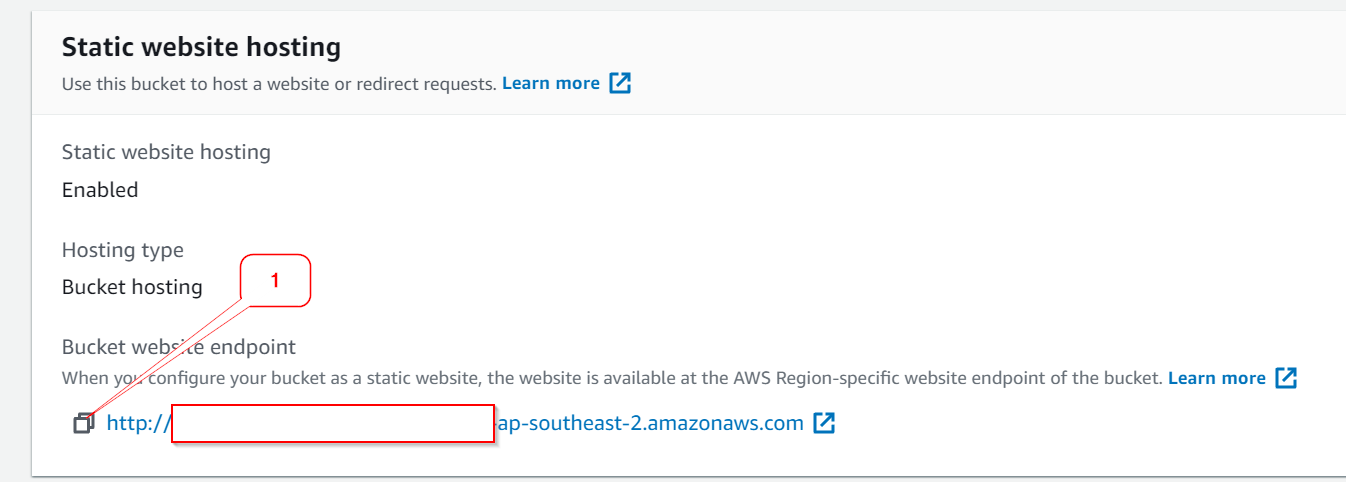
Save this URL in a TextFile, or Notepad, as you will use it a few times later in this article.
2.2 Configure the AWS S3 Bucket Policy
Scroll back to the top of the page
Select “Permissions”
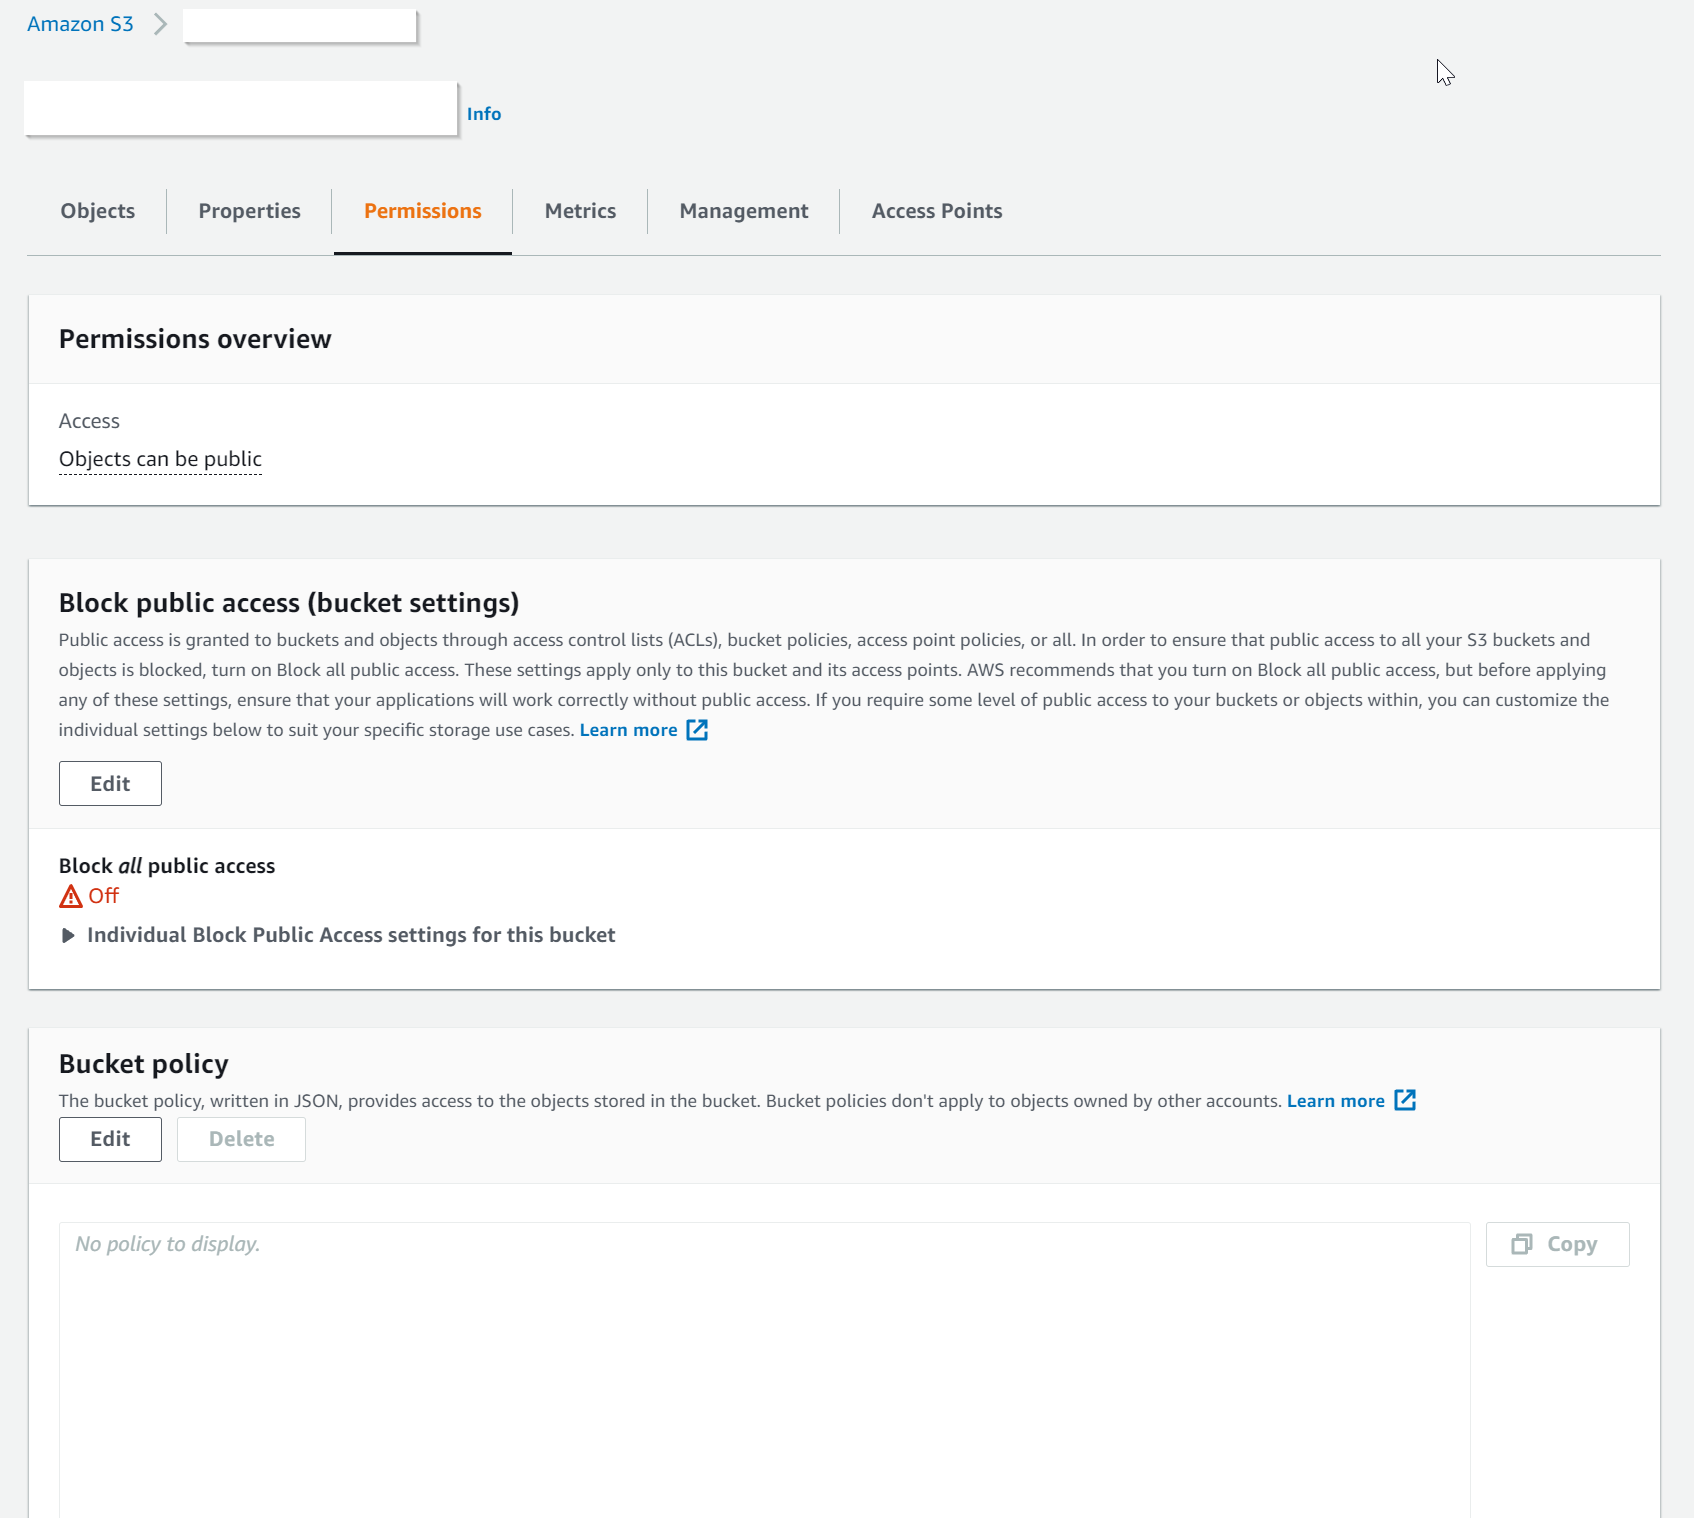
Scroll to the “Bucket Policy” section, and click Edit:

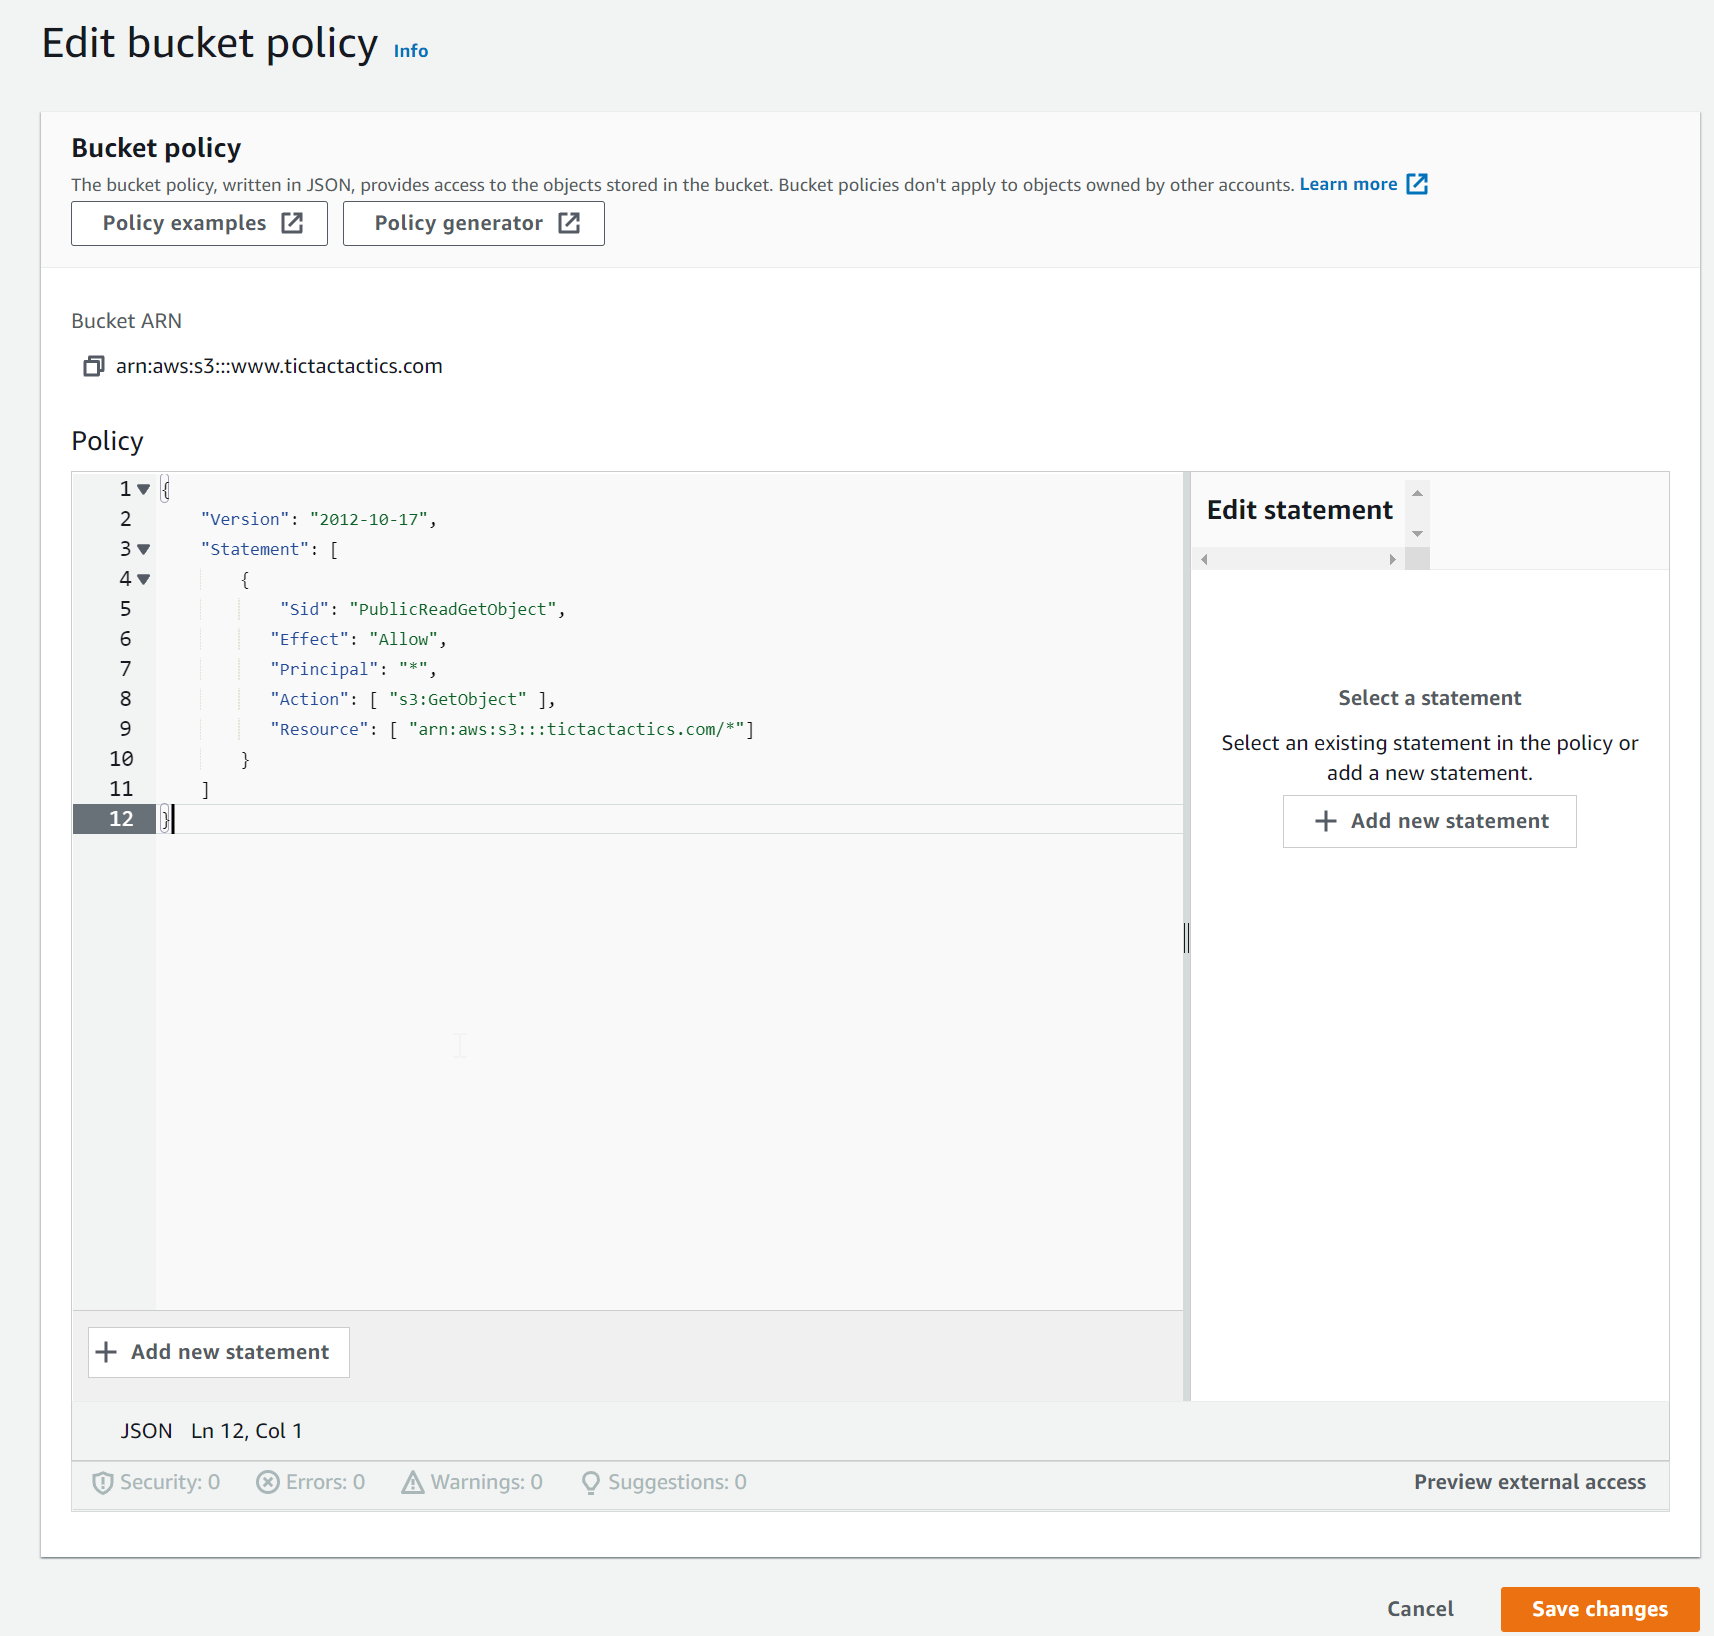
Create a bucket policy (Permissions/Bucket Policy), with the following content:
1 | { |
- Click Save Changes:
The bucket setup is complete, next, we will do the SSL Certificate and AWS CloudFront
3. Setup SSL Certificate using AWS CloudFront
We will now create a SSL certificate and setup AWS Cloudfront.
An SSL certificate is a digital certificate that encrypts data transmitted between a website and a user’s web browser to ensure secure communication.
AWS CloudFront is a content delivery network that speeds up the distribution of your static and dynamic web content, such as HTML, CSS, JavaScript, and videos, to end-users.
3.1 Create and Configure a CloudFront Distribution
Navigate to CloudFront:
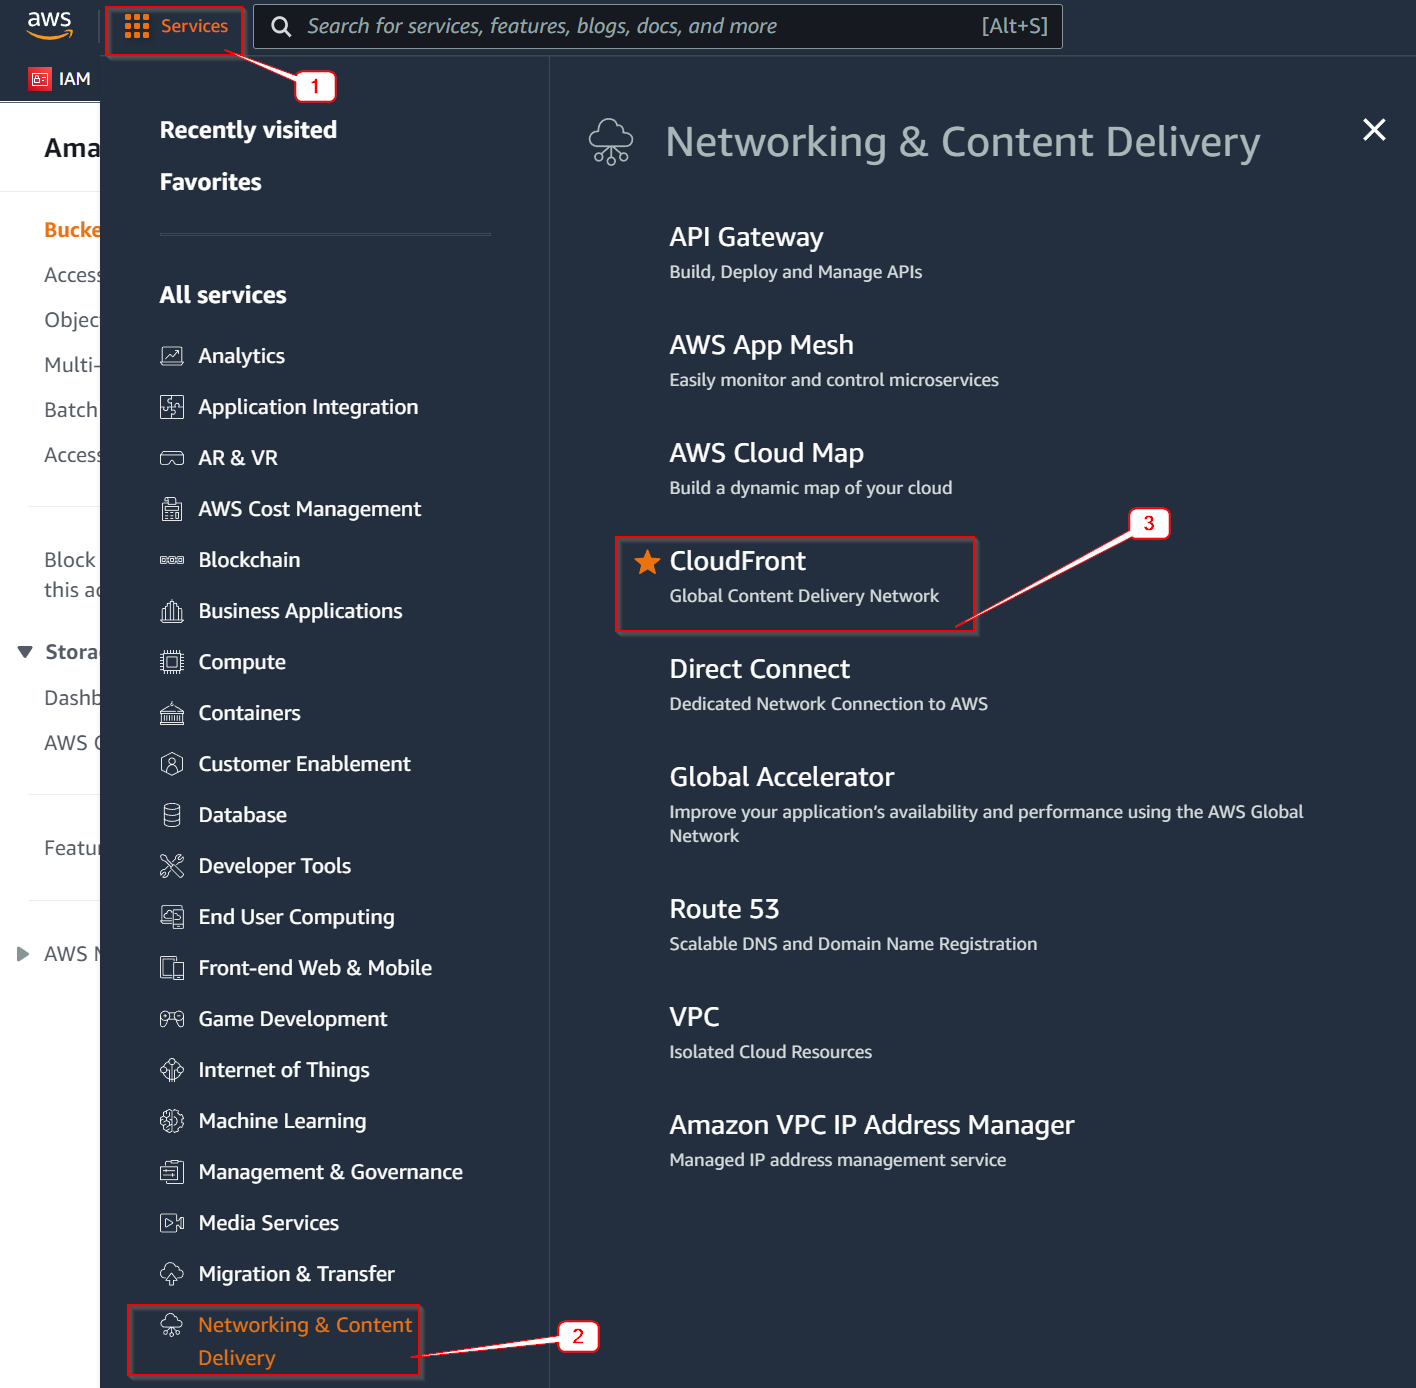
Make sure you are in the Global region
You should now see a list of Distributions (if any)
Click “Create distribution”:

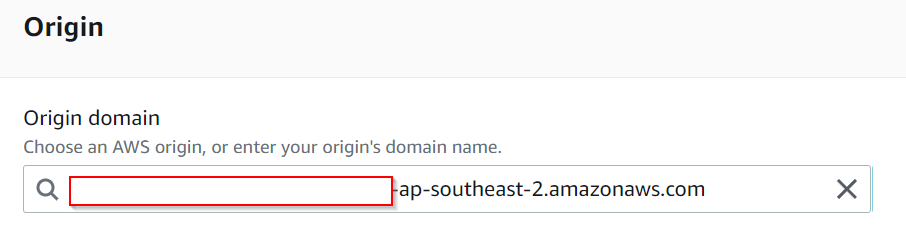
Paste Bucket URL (from the Enable Static Hosting section above) in the Origin Domain field:
NOTE: Don’t select any option from the dropdown list!
Redirect HTTP to HTTPS

Add an alternate domain name, this is the domain name you want to link to this bucket.

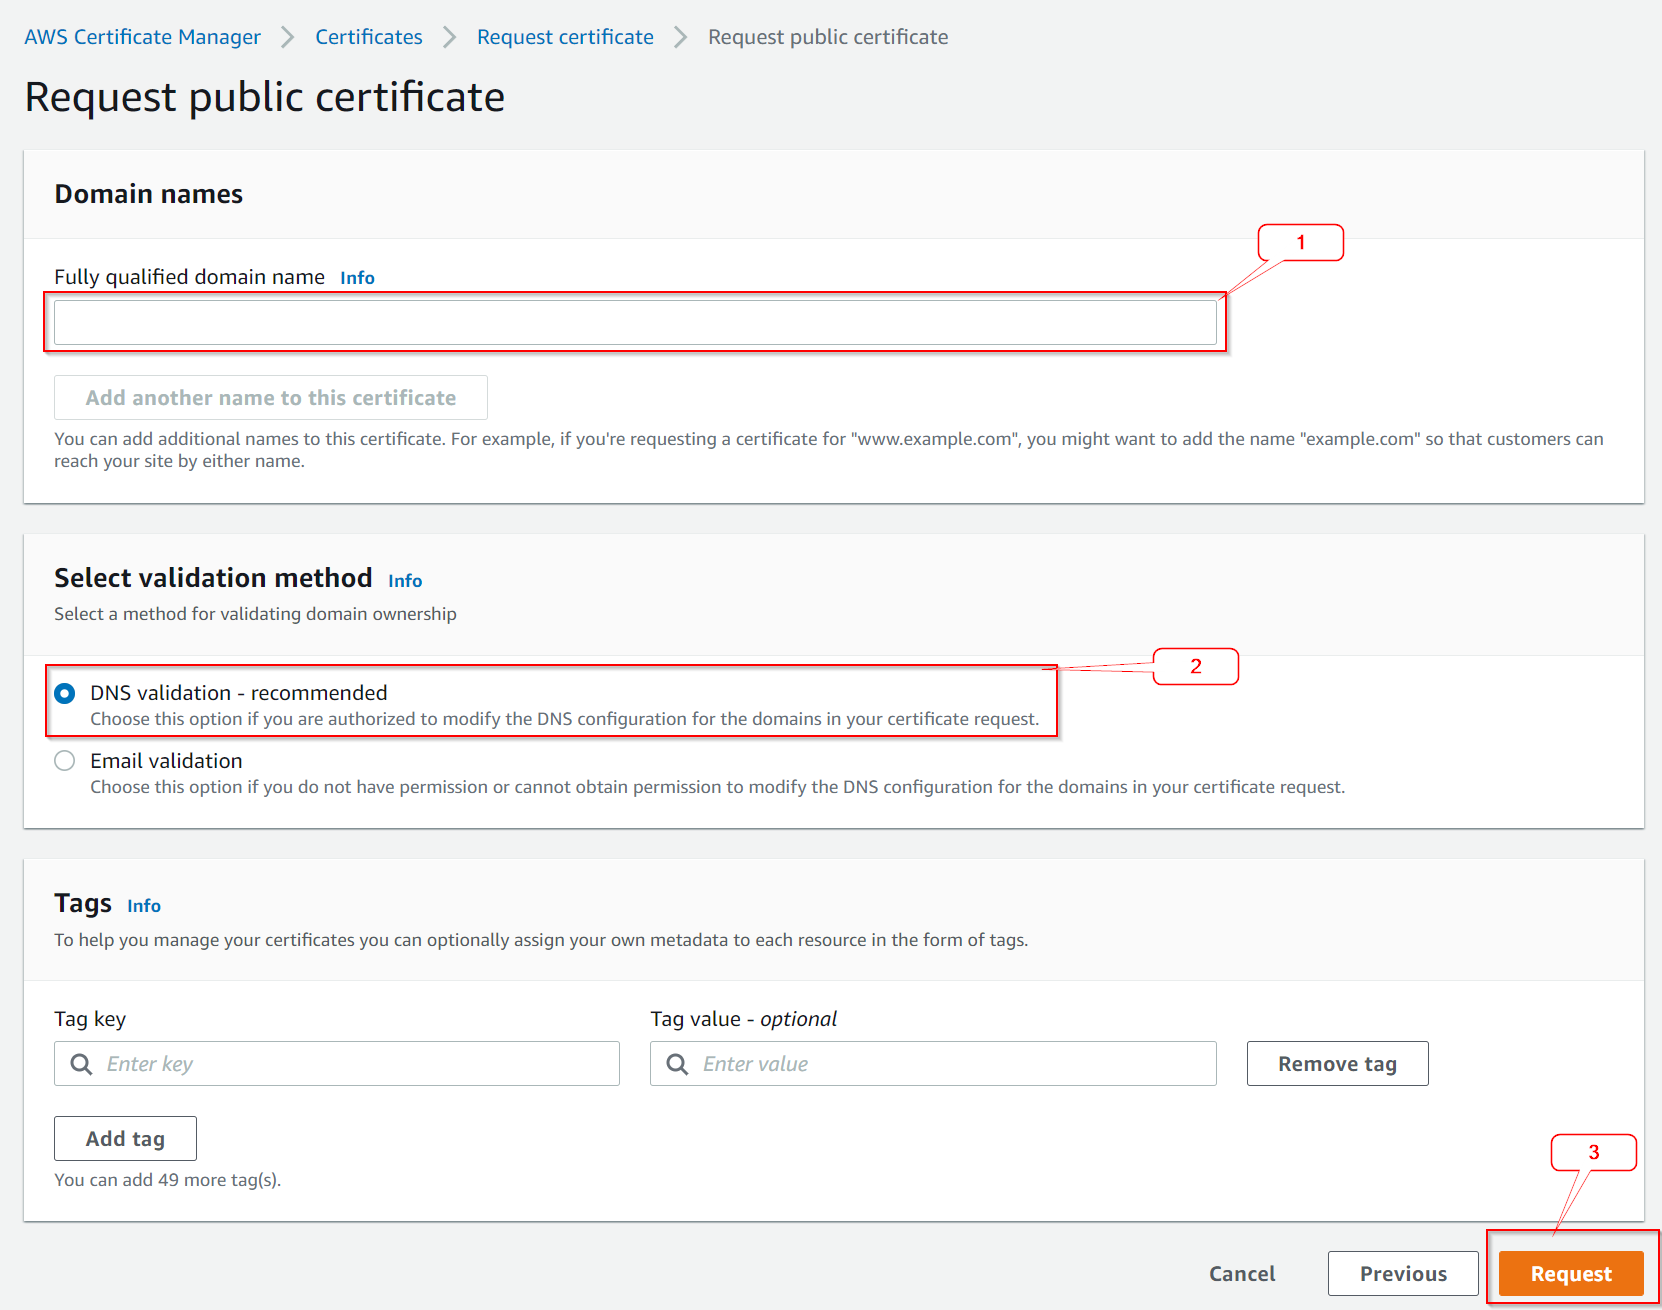
In the “Custom SSL Certificate” section, click on “Request Certificate”:

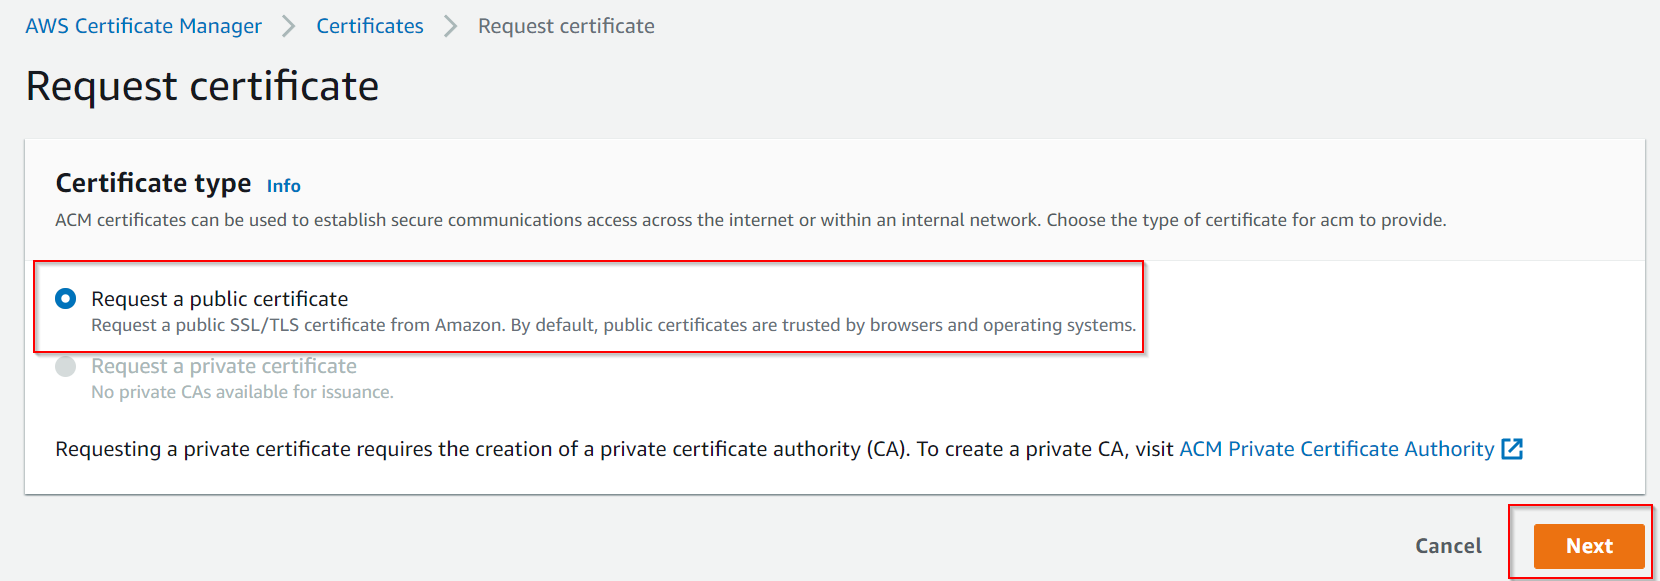
This will navigate to a new page, which is the AWS Certificate Manager
Make sure “Request a public certificate” is selected, then click “Next”
Fill in the domain you want to use
Select “DNS validation”
Then click “Request”
You should be navigated back to the AWS Certificate Manager page.
Refresh the AWS Certificate Manager page.
You should see a list of certificates.
Click on the Certificate ID you just created.
Copy the DNS Settings (CNAME and CNAME Value)
3.2 Linking Cloudfront to your Domain
Go to your Domain Registrar
Create a new record.
- Hostname: CNAME value from above (Note: In Google Domains, leave out the domain name)
- Type: CNAME
- TTL: 600
- Data: CNAME Value from above
Go back to AWS CM
Wait for the status to change from “Pending validation” to “Issued”
Head back to CloudFront
Click Refresh

Select the certificate you just made
In the Default root object, enter index.html

Click “Create Distribution”
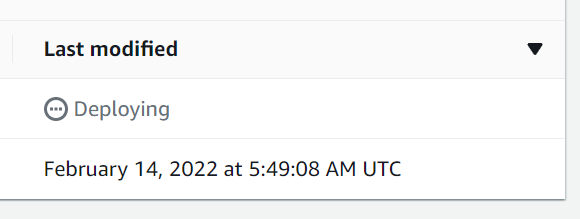
Head back to CloudFront, the Distribution should display “Deploying” in the “Last Modified” column:
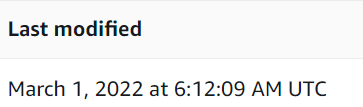
Wait for “Deploying” to change to a date:
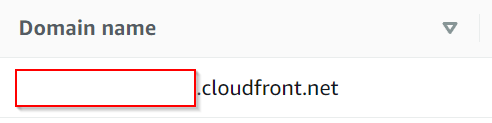
Copy the CloudFront Domain name
Head back to your Domain Registrar
Create a new CNAME record
- Hostname: The sub-domain you want to use, eg, www, dev, app,
- Type: CNAME
- TTL: 600
- Data: The CloudFront Domain from the previous step:

Troubleshooting
The Website is not loading
Verify each step, and determine where you are having issues, try debugging each URL, for example:
- Test the public AWS S3 URL, for example: http://BUCKET-NAME.REGION.amazonaws.com
- Test the CloudFront Domain, for example: CLOUDFRONTID.cloudfront.net
- Test the linked domain
Angular + AWS S3 NoSuchKey
https://stackoverflow.com/questions/44382709/aws-s3-bucket-404-not-found